7 Simple Steps to Safely Remove Your Gun Safe Door
Many gun owners understand the worry of safely removing a gun safe door—it’s not always straightforward or safe if you’re not sure how. You’re not alone; many people struggle with this task and want to do it correctly to avoid damage or injury.
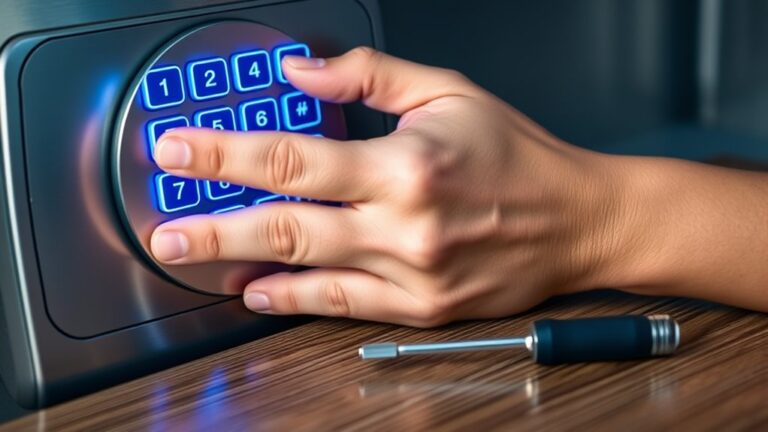
To safely remove your gun safe door, start by wearing protective gear and clearing your workspace. Next, unplug the safe and disengage the lock mechanism.
Support the door as you locate and unscrew the hinges carefully. Once loose, gently detach the door, making sure all hardware is removed or loosened.
Double-check everything is secure before reattaching or maintaining your safe. Following these steps guarantees safety and proper removal—keep going to learn more detailed methods.
Key Takeaways
- Make sure the safe is unplugged and all power sources are disconnected before you start removing the door.
- Place the safe on a flat surface and secure it so it doesn’t move around while you’re working.
- Find the hinges and carefully unscrew them, supporting the door to avoid dropping or damaging it.
- Check how the hinges and door line up, then gently detach the hinges from the door and the safe frame.
- Test to see if everything moves smoothly, and reattach the hinges securely if you plan to reinstall the door later.
Safety Tips and Key Considerations Before Removing Your Gun Safe Door
Before attempting to remove your gun safe door, it’s essential to prioritize safety and understand key considerations. First, make sure you wear protective gear like gloves and eye protection to prevent injuries. Clear the area of obstacles to avoid accidents during the process.
Check the door’s alignment; if it’s misaligned, forcing removal could damage the safe or cause injury. Carefully evaluate whether the door needs to be fully detached or just loosened, as improper handling can compromise the safe’s integrity.
Assess door alignment carefully to avoid damage or injury when removing or loosening the safe door.
Remember to work slowly and deliberately, avoiding sudden movements that could cause the door to fall unexpectedly. If your safe has electronic or locking mechanisms, disconnect power sources or secure the lock before proceeding.
Always read the manufacturer’s instructions or consult a professional if you’re unsure about the process. Prioritizing safety precautions and understanding door alignment are critical steps to prevent damage and keep yourself safe during removal.
Gather the Right Tools and Prepare Your Workspace
Before you start removing the gun safe door, it’s a good idea to gather all the necessary tools—things like screwdrivers, wrenches, and some protective gear. Having everything within reach makes the job a lot easier and less frustrating.
Also, take a moment to clear and organize your workspace. A tidy area not only helps prevent accidents but also makes it simpler to keep track of your tools. When everything is in place, the whole process will go much more smoothly and safely.
Essential Tools Needed
To successfully remove a gun safe door, you’ll need a specific set of tools to handle the task safely and efficiently. These tools are essential for proper gun safe maintenance and smooth door replacement. Without them, you risk damaging the safe or injuring yourself.
Here are the key tools you’ll want to gather:
- Socket wrench set for removing bolts and hinges
- Screwdrivers (Phillips and flathead) for disassembling panels
- Pry bar to gently loosen the door if stuck
- Rubber mallet to avoid damaging surfaces during removal
Having these tools ready guarantees a safer, quicker process. Proper preparation makes door removal easier, especially if you plan on maintaining or replacing the door as part of your gun safe routine.
Clear and Organized Space
Creating a clear and organized workspace is essential to guarantee a smooth and safe removal process. Start by decluttering the area around your safe, removing any unnecessary tools or objects.
Use organizational strategies like labeled containers or trays to keep small parts and tools within easy reach. Make certain your workspace is well-lit and free of hazards to improve efficiency.
Clear surfaces help you work more effectively and reduce the risk of accidents. Arrange your tools systematically so you can find what you need quickly.
A tidy, well-organized area not only speeds up the removal but also minimizes frustration. Taking these steps beforehand sets a strong foundation for a safe, efficient, and stress-free process.
Secure Your Safe and Remove Internal Components Safely
Making sure your safe is secure before removing internal components is essential to prevent accidents or damage. First, unplug the safe and disconnect any power sources to avoid electrical hazards.
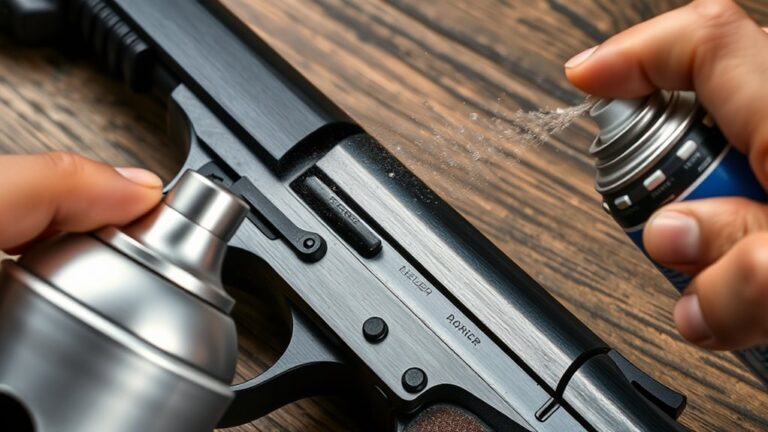
Next, double-check that the lock mechanism is disengaged to prevent unexpected movements. Then, perform door maintenance by inspecting hinges and applying hinge lubrication if needed; this makes removal smoother and prevents damage.
Finally, stabilize the safe on a flat surface using blocks or supports if necessary, to prevent tipping or shifting during component removal.
Here are the key steps to follow:
- Unplug and disconnect power sources.
- Disengage the lock mechanism.
- Inspect and lubricate hinges for smoother removal.
- Stabilize the safe on a flat surface.
Taking these precautions makes sure your safe stays secure, and internal components can be removed safely and efficiently.
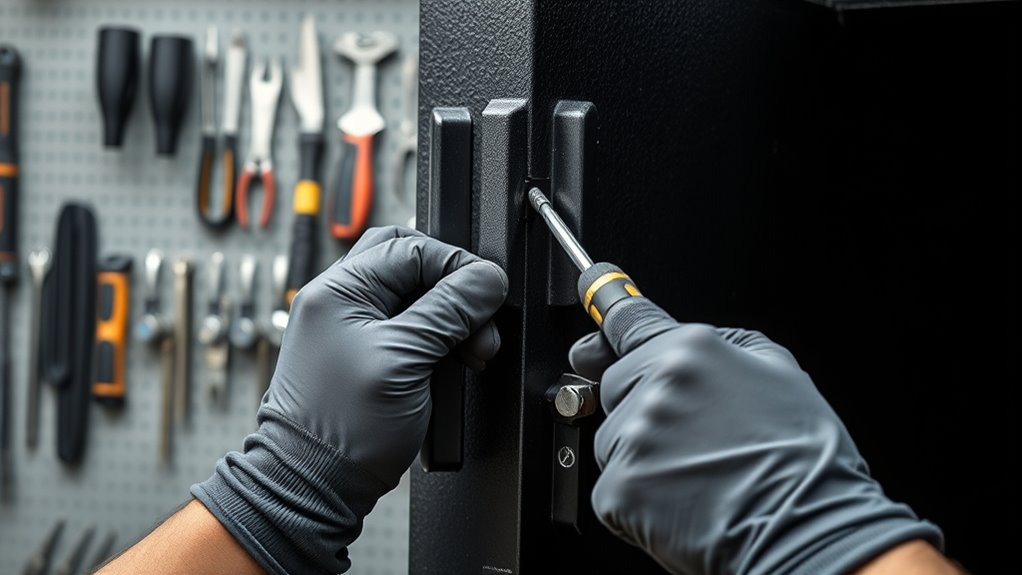
How to Find and Unscrew the Gun Safe Door Hinges
First, you’ll want to find the hinge screws. They’re usually right along the edges of the safe door, so just take a good look around. Once you spot them, grab the right screwdriver—make sure it fits well so you don’t strip the screws. Then, gently unscrew each hinge, taking your time with it. Rushing might cause damage, so go slow and steady—that way, everything comes off smoothly without any hassle.
Locate Hinge Screws
To locate the hinge screws on your gun safe door, start by examining where the door connects to the main body. Different hinge types might hide screws differently, so check both visible and concealed parts.
Look around the hinges for screws that might be hidden or recessed, especially if you have concealed hinges. Also, inspect the top and bottom edges of the door for any visible screws.
Don’t forget to check inside any decorative covers or trim that might be hiding screws. Make sure to verify the screws’ positions so you’re removing the right ones and keeping the door aligned.
Knowing your hinge types makes it easier to find the screws and helps ensure a smooth removal process.
Unscrew Hinges Carefully
Carefully unscrewing the hinges is essential to prevent damage to the door or the safe itself. Use the correct screwdriver to avoid stripping the hinge screws.
As you unscrew, keep track of the hinges and screws for hinge maintenance later. Gently support the door’s weight to maintain proper door alignment during removal.
Take your time and avoid forcing or jerking the hinges, which could cause damage. Once the screws are fully removed, slowly lift the door away, checking for any remaining attachment points.
Proper hinge maintenance makes reinstallation easier and helps keep the door aligned properly. Being cautious during this process preserves the integrity of the hinges and guarantees a smooth, damage-free removal.
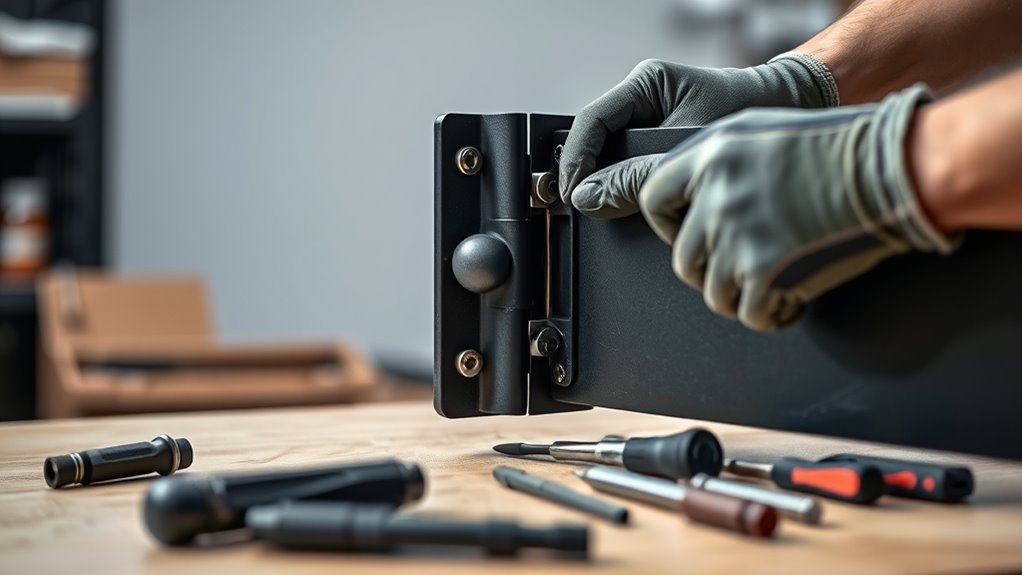
Support and Detach the Gun Safe Door Carefully
Before removing the gun safe door, it’s important to support it properly to avoid damage or injury. The door’s weight and hinge type affect how you should support it during removal. Handling heavy doors without support can lead to accidents or damage.
To ensure a safe process, follow these steps:
Follow these steps to ensure a safe, stable removal process and prevent damage or injury.
- Assess the door’s weight so you know how much support you’ll need.
- Identify the hinge type—whether it’s piano, butt, or continuous—to figure out the best way to detach it.
- Use a sturdy support like a jack or ask a helper to hold the door steady.
- Align your grip with the hinge pins for a smooth removal, avoiding unnecessary strain.
Supporting the door properly reduces risks and makes taking it off easier. Always focus on stability, especially if the door is heavy or has specialized hinges. This way, you’ll have a safe, damage-free removal process.
Final Checks and Complete Removal of the Safe Door
Once you’ve supported and detached the door, it’s important to do final checks. Make sure all components are properly disconnected and nothing has been missed.
Take a thorough look at the door and surrounding areas. Confirm that all hinges, bolts, and brackets are removed or loosened.
Check for any remaining hardware that might interfere with the safe’s operation or reinstallation. Make sure the door is free of debris or damage that could affect alignment during reattachment.
Carefully examine the pivot points and mounting surfaces to ensure they’re clean and intact. If everything looks good, gently test the door’s movement to see if it swings smoothly without obstruction.
Proper door alignment is key for the safe’s functionality, so double-check that the door sits correctly in its frame. Once you’re satisfied with your inspection, you can proceed with the complete removal confidently.
Reattaching and Replacing Your Gun Safe Door Safely
Reattaching and replacing your gun safe door carefully is important to ensure it works properly and stays secure. Proper door alignment helps it open and close smoothly and keeps everything safe, so take your time with the process.
Start by checking the hinges for any signs of wear or damage. If needed, do some hinge maintenance—lubricate or replace parts to keep things running smoothly.
To get a tight fit, follow these steps:
- Carefully align the hinges with the door and safe frame.
- Tighten all hinge screws securely, making sure none are loose.
- Test the door’s movement to ensure it opens and closes smoothly.
- Periodically recheck the hinges and door alignment to prevent issues down the line.
Frequently Asked Questions
Can I Remove My Gun Safe Door Alone Safely?
You can remove your gun safe door alone if you follow proper safety precautions and have the right tools, like screwdrivers or wrenches.
Always verify the safe is empty, secure, and stable before starting. Wear gloves and eye protection to prevent injuries.
Carefully follow the manufacturer’s instructions, and if you’re unsure about any step, consider asking a professional for help to avoid accidents or damage.
What Are Common Mistakes to Avoid During Removal?
You should avoid rushing or forcing the door during removal, as mishandling can cause damage or injury. Follow door handling tips carefully, like supporting weight evenly and using proper tools.
Don’t skip safe maintenance advice, such as disconnecting the lock mechanism or securing the safe first. Always wear gloves for grip and protection.
Being cautious helps prevent accidents and keeps your safe in good condition during door removal.
How Long Does the Removal Process Typically Take?
Think of it like a well-rehearsed dance. Removing your safe door usually takes about 30 minutes to an hour. The actual time depends on your removal techniques and how heavy the safe door is.
If you’re cautious and methodical, you’ll avoid mishaps and finish the job efficiently. Rushing can cause damage or injury, so it’s best to take your time.
With patience, you’ll have that door off and your safe ready for maintenance or relocation.
Will Removing the Door Affect the Safe’s Security?
Removing the safe door can affect door security temporarily, but if you follow proper procedures, the overall safe integrity stays intact.
When you carefully detach the door, you help prevent damage that could weaken security. Just make sure to reattach it correctly afterward.
This way, your safe remains secure, and your valuables stay protected. Proper removal and reinstallation are key to keeping the safe both secure and functional.
Do I Need Professional Help to Remove the Door?
You don’t necessarily need professional help to remove your gun safe door, but you should follow safety precautions and have the right tools.
Gather a wrench, screwdriver, and possibly a helper to avoid accidents. Carefully follow instructions, guarantee the safe is unloaded, and wear gloves for protection.
If you’re unsure or uncomfortable, hiring a professional guarantees the job gets done safely and correctly, especially for heavy or complex safes.
Conclusion
Now that you know the steps, you’re almost there. But remember, a small mistake can lead to big trouble. Are you ready to handle the unexpected?
As you approach the final moments of removing your gun safe door, stay alert and cautious. The task isn’t just about detaching a door. It’s about making sure everything is safe at every step.
Ready to finish the process and keep your gun safe secure? Keep going—you’re closer than you think.